
Please visit also my other webpage
www.my-rpg-page.net
Dwarves & Beastmen | Attack on Three Oaks
This Fantasy game was played on 2015-07-18 at Matthias' place using Warhammer Fantasy Battles - Warhammer for Adults-Rules (set in ' The Old World ') and 28mm miniatures. This report was written by Bernd & Matthias.
Briefing
Kevron Clear Hallway, Thane of a small outlying dwarven mine, was asked to send a relief force to another small dwarven outpost close by, which was under constant attack of several allying Chaos warbands. Immediately he mustered a small force, constricted by the need to keep his own premises defended. But within this limit he marched off with all the troops that could be spared.
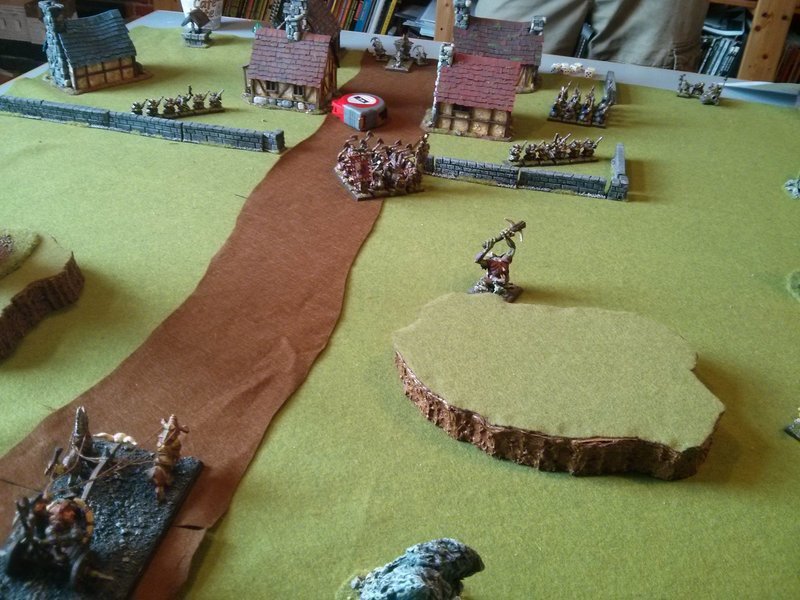
On his way to his neighbour, he passed Three Oaks, a human village only half a day from his mine, with whom the Dwarves have frequent and friendly trade contact. As they entered the village with the goal to buy additional provisions for their campaign, they met with very agitated and frightened villagers, who expected an attack from a Beastmen raiding party! The outlying farms had already been destroyed, the survivors telling the tale; the direction of the attacks clearly pointing to Three Oaks.
Couriers had been sent to the next Empire garrison, but help would probably only come after the Beastmen had reached the village.
It was no question for Kevron then to delay the relief of the Dwarven mine, after all they held back the Goblin forces for some time, one or two days more they could handle. On the other hand it was no option to leave the human friends to their destiny.
So the dwarven companies were assigned defensive positions, and only a couple of hours later the Beastman raiding force appeared on the horizon, closing in quickly...
| Dwarves | Beastmen | |||
|---|---|---|---|---|
| [ Bernd ] | [ Matthias ] | |||
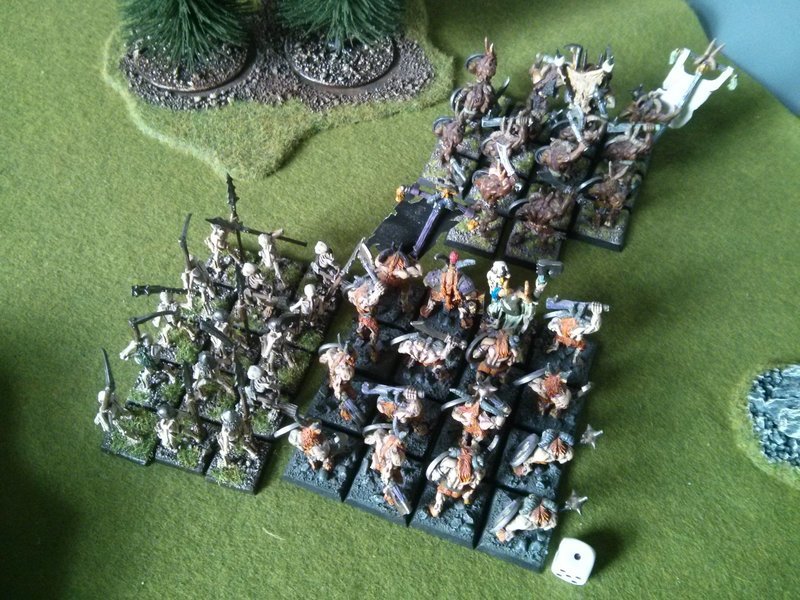
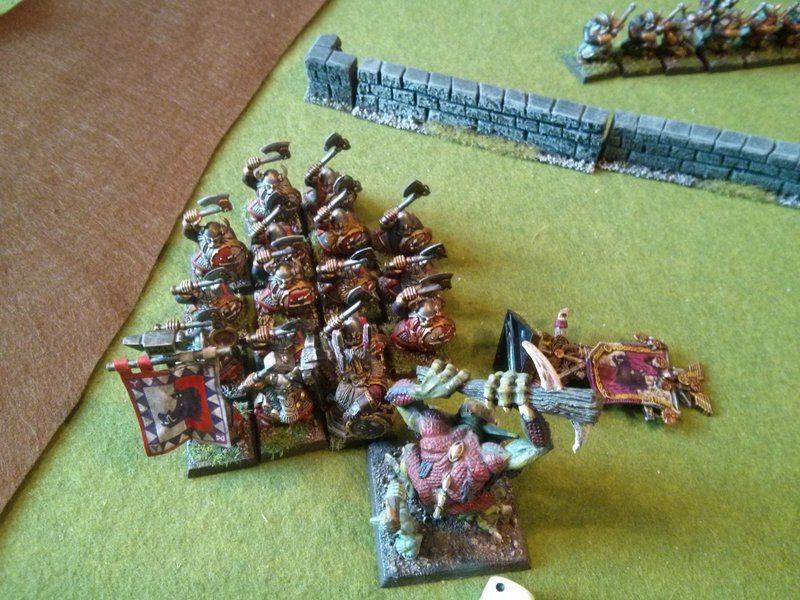
| War Forger General, "Kevron Blackforge", Level 15 Hero, Mithril heavy armour, pistol, double handed hammer | 160 | Feralfiend General, "Deepmagog", Level 15 Hero, double handed weapon, heavy armour | 185 | |
| Foe Smiter, "Rhychdir Calcitebasher", Level 5 Hero, army standard, heavy armour, hand weapon | 101 | Marauder, "Putridmugger", Level 10 Wizard, hand weapon | 160 | |
| Foe Smiter, "Morgannwg Shaleworker", Level 5 Hero, hand weapon, heavy armour, shield | 52 | 16 Beastmen, "Three Skulls", standard, hand weapons, shields, light armour | 169 | |
| Foe Smiter, "Kile Agate-Soil", Level 5 Hero, hand weapon, heavy armour, shield | 52 | 13 Beastmen, "Tri Star", standard, hand weapons, shields, light armour | 221 | |
| 15 Dwarf Warriors, "Red Company", hand weapon, light armour, shield | 187 | Beastmen Chariot, "Rolling Death", 2 crew, 2 Boars, halberd, light armour; scythes | 200 | |
| 15 Dwarf Warriors, "Blue Company", hand weapon, light armour, shield | 187 | Troll, "Toadwringa", big club | 65 | |
| 7 Thunderer, "Green Company", arquebus, hand weapon, light armour | 91 | |||
| 7 Thunderer, "Turquoise Company", arquebus, hand weapon, light armour | 91 | |||
| Cannon, "The Barrel", 3 crew | 69 | |||
Execution
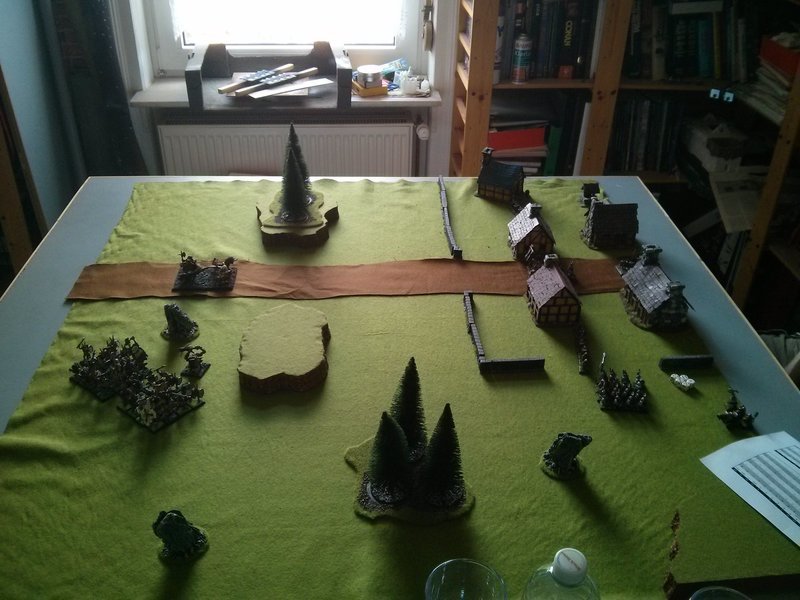
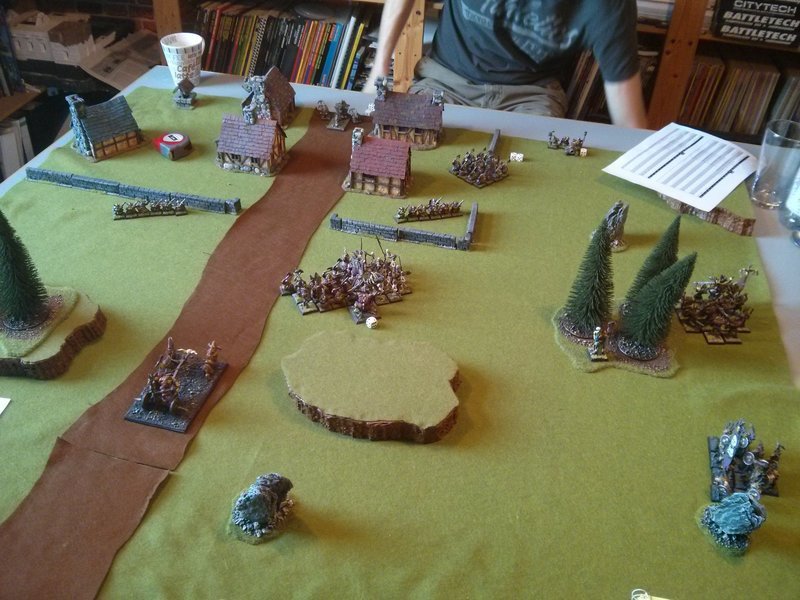
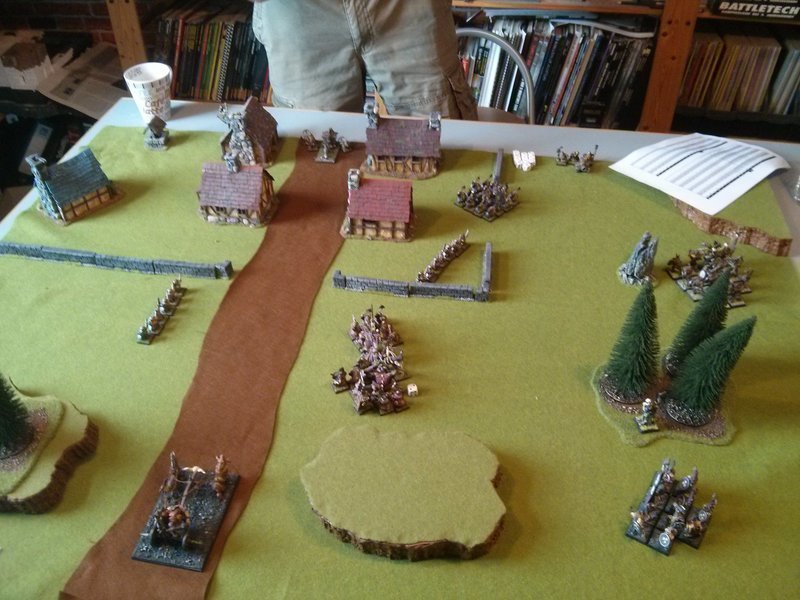
Deployment
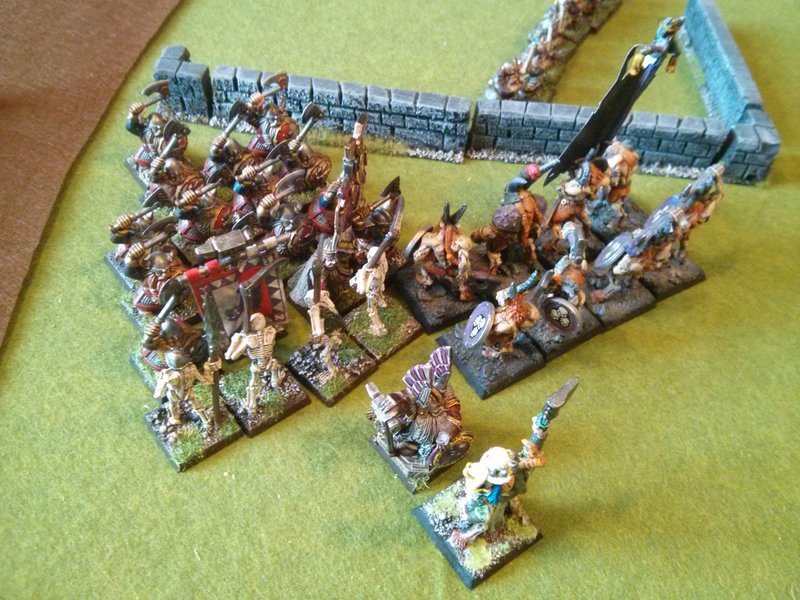
Dwarves

Dwarf General

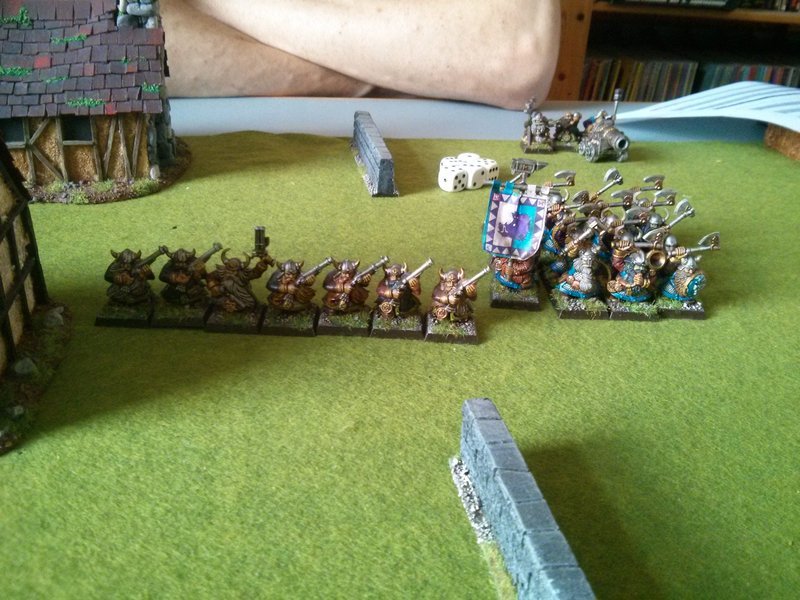
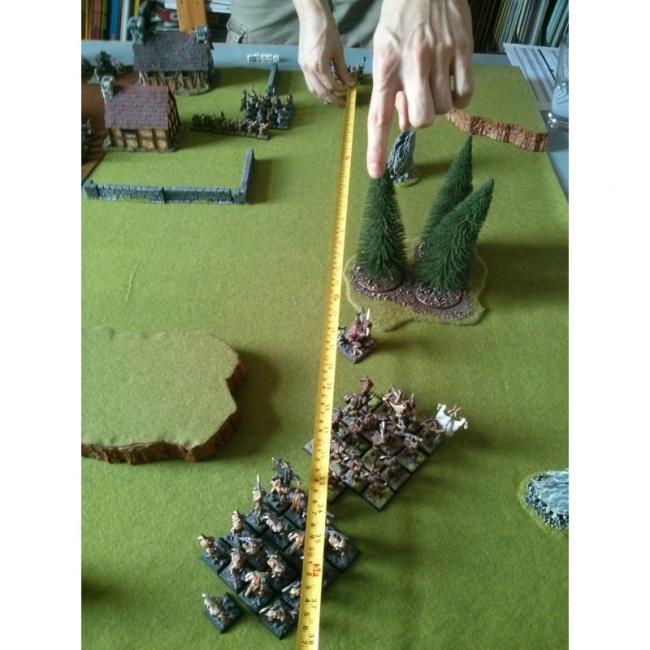
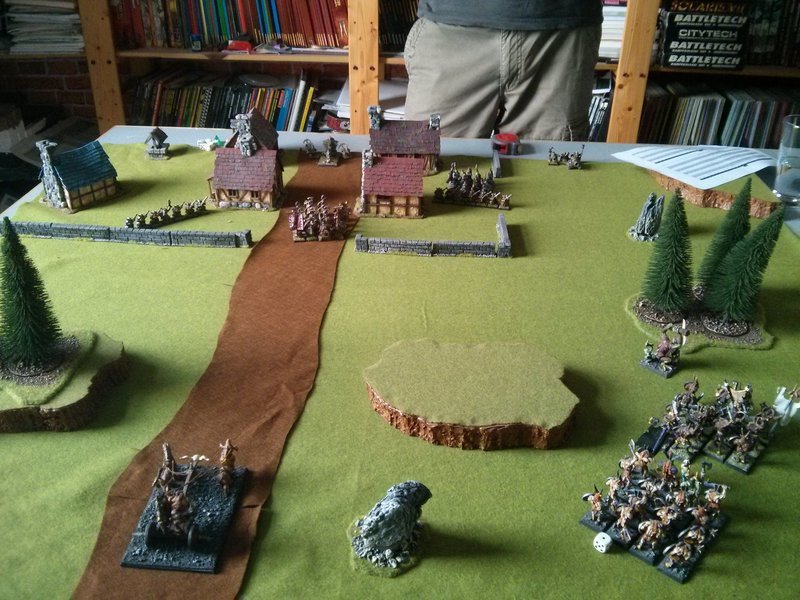
Kevron inspected the battefield. He stood on the outskirts of the village, which was surrounded by a little stone wall. With only two entrances, the main gate at the front and one on his left flank, Kevron decided that it would be best to deploy both his melee units to guard those. As the Beastman would probably send their brunt through the main gate he decided to join his Red Company that would be deployed there, while the blue company would guard the other entrance.
Luckily he had also two units of Thunderers at his disposal which would prove to be invaluable against the tough Beastmen. He pondered over whether he wanted to keep these units at the back, but then decided to deploy them as far forward as he could. The idea was that they would move up to the wall to be in threat range, then shoot as long as possible and finally retreat if the enemy would deceide to come after them. Hopefully the wall would grant enough time for an ordered retreat...
His view moved to the entrance at his left flank where his cannon was deployed outside of the village. A sudden flash of anger surged through him. "That idiot of a mayor!", he thought to himself. An hour ago he had a heated discussion with mayor Brunswick: Kevron was of the opinion that the cannon should be deployed in the center of the army so that it, as even a Dwarven youngling knows, had the best protection. The downside was, of course, that the cannon would have to shoot through the wall more often than not, and the mayor would not hear anything about it. "Just recentenly rebuild... did cost a fortune... no more stones available...", and so on and so on. Well, as stubborn as Dwarves are, they also respect someone elses property, so at the end he chose the position outside. Hopefully the blue company would be able to guard it and also protected the entrance as well.
Beastmen
Beastman General
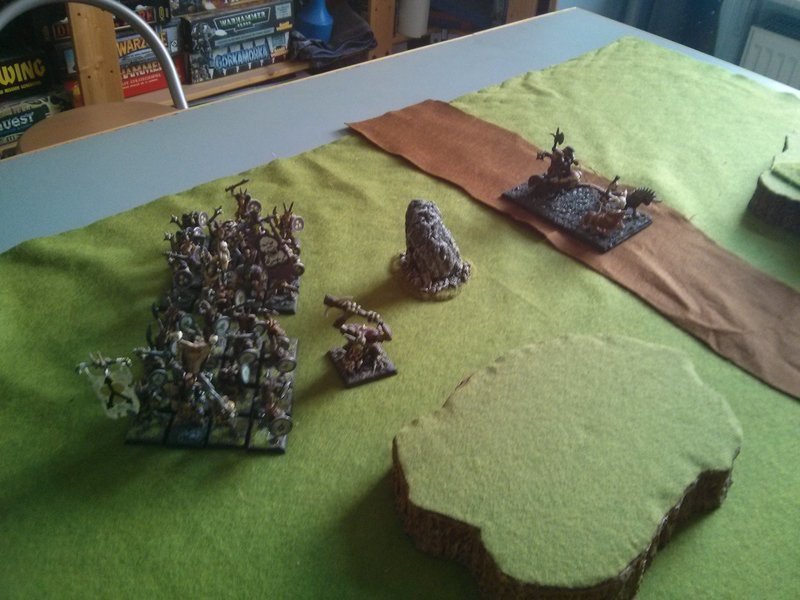
After Deepmagog saw the Dwarven deployment, he immediately thought of a plan to overturn their strategy - in contrast to common belief even Beastmen are able to do so. He would send all his troops around the right flank, using the wood to close quickly and unmolested with the cannon. Once this was overrun, half the Dwarven force would still be on their way from their quiet right flank to their left flank. Toadwringa would be closest to the Dwarves to soak up the fire of the Thunderers, with his ability to regenerate he was the best asset for that - besides he was so dumb as not to notice to being used in this way.
All the while the chariot would remain at its place, waiting for the Dwarves to begin the move over to the other flank, then it would surge forward into their flank.
With his main force outnumbering one Dwarven flank, Deepmagogg was sure to be able to loot the puny village in no time.
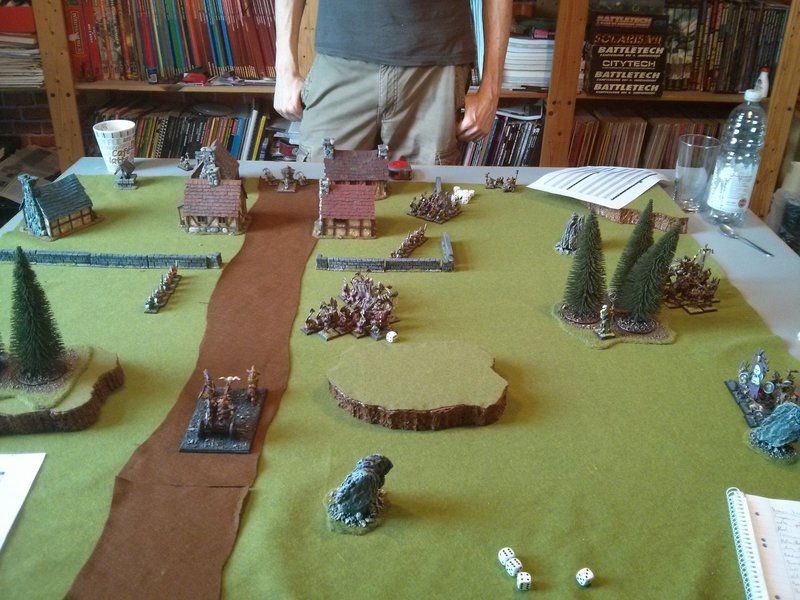
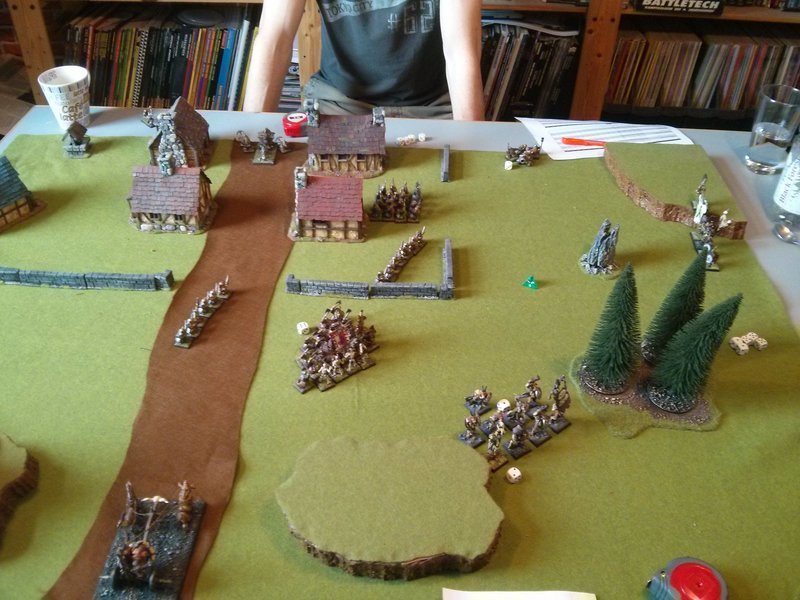
Turn 1
Beastmen
Toadwringa passed his Stupidity test, then all units moved towards the right flank, except the chariot which remained stationary.

Dwarves
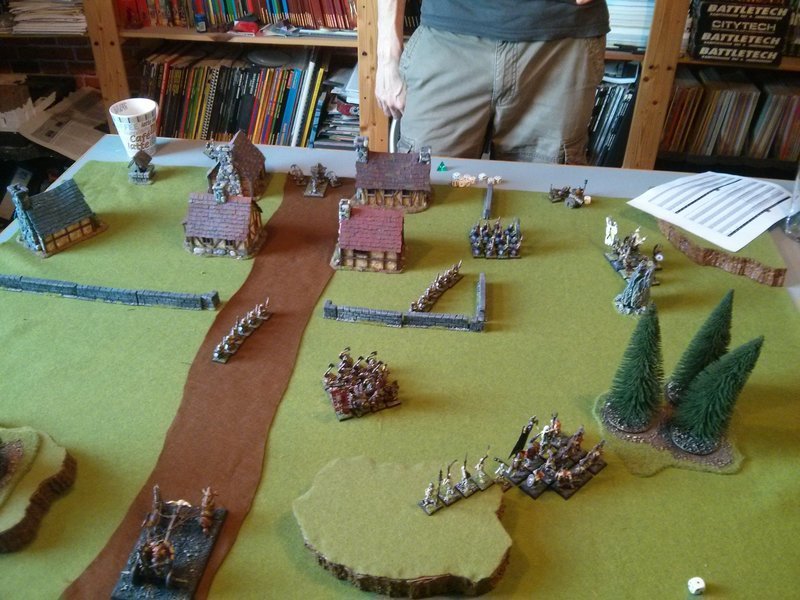
The whole Dwarven battleline crept forward on their right flank, the Thunderers moving up to the walls, the Red Company led by Kevron moving outside the village bounds towards the advancing Beastmen.
On the left flank, the Blue Company made a 180° turn and moved back into the village.
The cannon had the first shot of the battle, hitting the Toadwringa causing 1 wound, 6 wounds on Three Skulls (killing 3 creatures) and 3 wounds on Tri Star, killing one, leaving one wounded.
The Green Thunderer Company targeted Three Skulls led by Deepmagog, scored 4 hits but did not manage to wound any of the followers of Chaos.
Toadwringa was momentarily confused, he thought to remember a burning pain in his side where the cannon ball ripped through him, but when he concentrated on the area there was no wound… he must have been mistaken then… (regeneration roll passed).
Turn 2
Beastmen
The troll passed his Stupidity test.
Again, the two Beastmen units moved forward, trying to get the wood between themselves and the dangerous cannon.
Toadwringa the troll had enough of his curious experiences with cannon balls first wounding him, then not, and moved toward the left Chaos flank, the little stunties from the Red Company seemed more like nice play things to him.
Putridmugger nearly spent all his magic points and summoned 4d6 Skeletons. The newly summoned unit of 15 undead was placed besides his Beastmen, facing towards the village.
Dwarves
The Green Thunderer Company changed their rank depth to be able to move between the cottage and the wall, to take up position near the wall.
The Red Company moved outside the village border towards the lumbering troll.
The Blue Company did a 180° turn, facing outside the village again.
The Turquoise Thunderers targeted the chariot, but rolled three ones which indicated three arquebuses blowing up into the Dwarves' faces. The bullets that went off towards Rolling Death broke his axle.

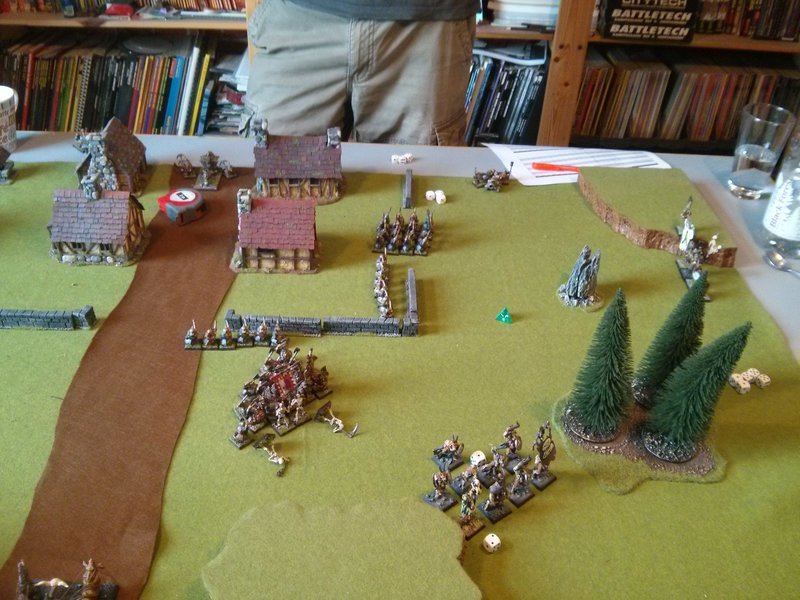
Turn 3
Beastmen
Toadwringa saw the Red Company moving towards him, which was confusing. Normally when he wants to play with stunties or humies, he has to chase them. That they were now moving towards him startled him. A bit less focused, he still moved towards them. (Failed Stupidity check, random direction still sent him towards the Dwarves.)
The chariot slitherd forward d6" before coming to a permanent halt.
While Deepmagog advanced around the wood with Three Skulls, Tri Star turned to advance behind the Skeletons.
Putridmugger remained stationary, remaining behind Tri Star and rested.

Dwarves
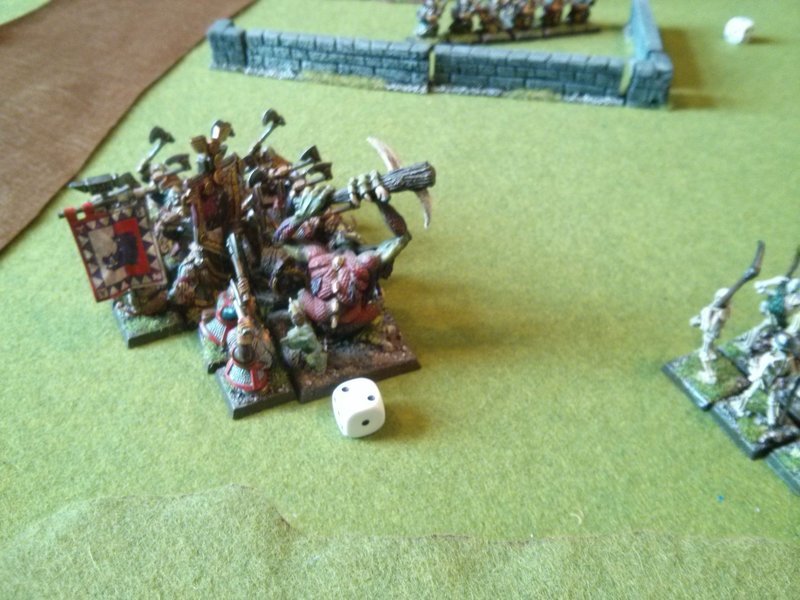
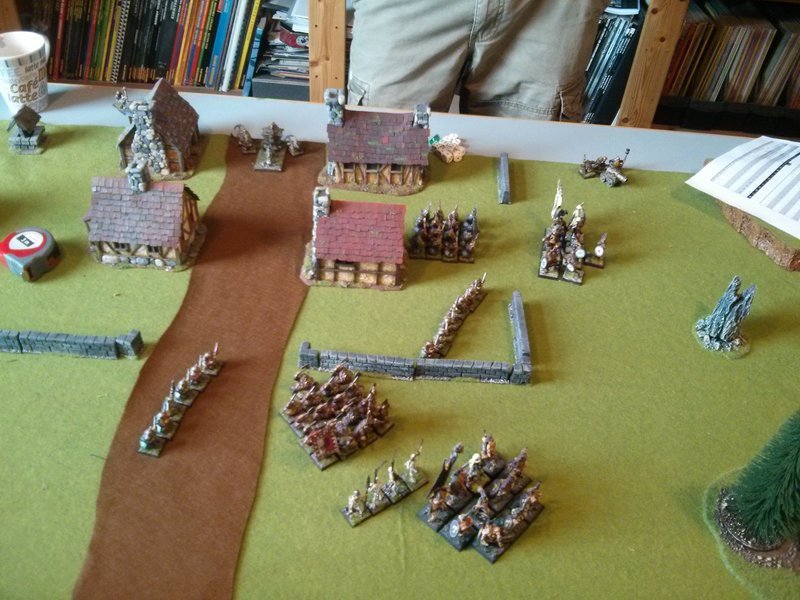
Kevron with his Red Company charged Toadwringa the troll.
The Turquoise Thunderers took up position at the wall.
Kile Agate-Soil ordered his Blue Company to move forward again, to get into a better position for meeting the flanking Three Skulls Beastmen.
The cannon targeted the Tri Star Beastmen, and killed another 5 of their ranks which let to a rout on part of the Beastmen.
The Green Thunderer Company fired at the Skeletons, again two Arquebuses blew up but did not hurt their wielders. One skeleton crumbled to dust under the impact of the lead balls.
Kevron and Rhychdir, the Army Standard Bearer, caused two wounds on Toadwringa, who was so excited about being able to play with the no-legs, that he threw up. The regurgitate attack killed Rhychdir Calcitebasher – he was just too flimsy a toy for the troll.
As the Dwarves won the combat, Foe Smiter Morgannwg Shaleworker, acting as the unit champion so far, picked up the Army Standard. Toadwringa was pushed-back and the Dwarves wrapped around the troll's flanks.
The troll did not regenerate the wounds caused this time.

Turn 4
Beastmen
The troll was so confused by all the beardlings scurrying around him, he stood there not able to decide with whom to play next (he failed his Stupidity test again).
The Shaman Putridmugger passed his Panic test caused by the routing Tri Star Beastmen streaming past him.
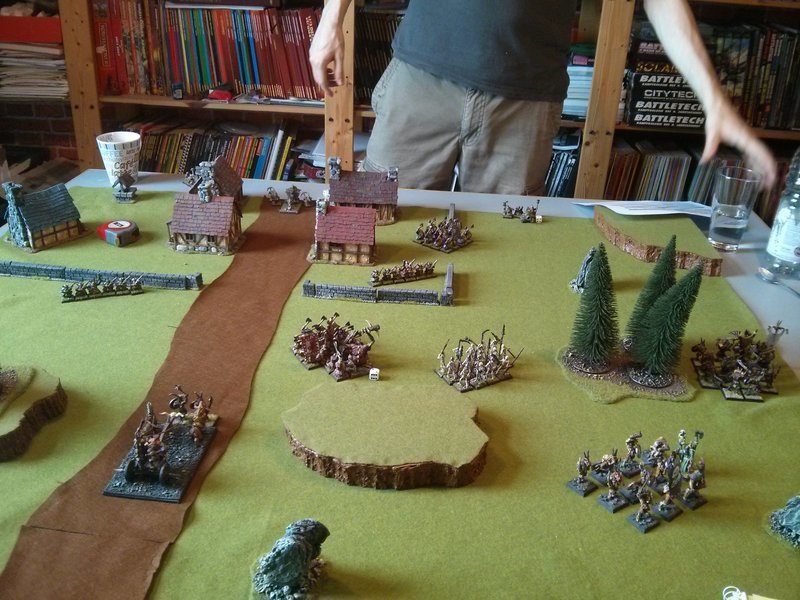
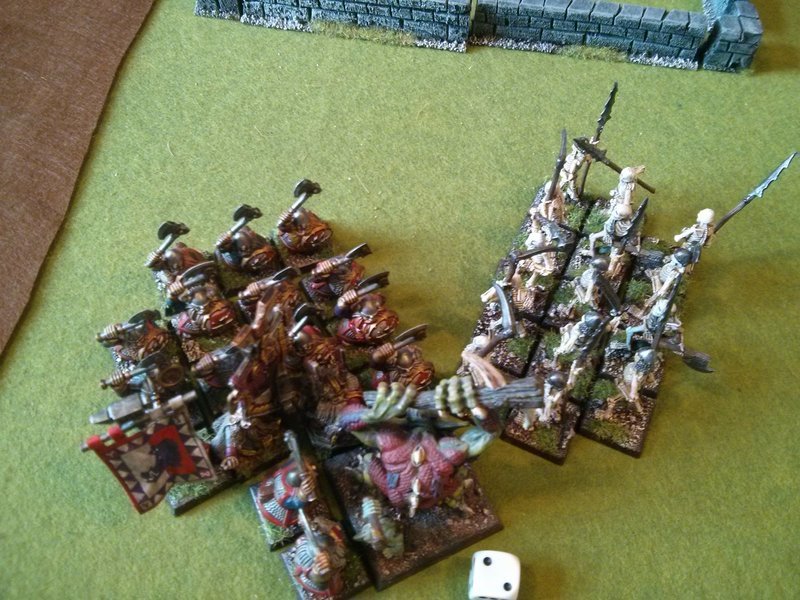
The crew of Rolling Death and the Skeletons declared charges on the Red Company. The Beastmen's charge into the Dwarven flank was fine, the Skeletons wheeled, moved forward, and hit the Dwarves at an angle > 22,5°. This caused the Skeletons' formation to become disrupted.
The Beastmen crew caused two hits, one wound but the Dwarven armour blocked the hit. The Dwarves caused one hit in return but did not manage to wound. Kevron hit the troll thrice and wounded him twice, killing him. Between the Skeleton and Dwarf no hits could be landed.
As the chaotic forces lost the combat, the Skeletons had to take an instability test, which they passed with a 6! This meant that casualties suffered this turn were resurrected! Yay! Unfortunately, they suffered none, so none were resurrected…
The Dwarves reformed their ranks.
The routing Tri Star Beastmen rallied thanks to being in the area of influence of their General Deepmagog.
Toadwringa suddenly found himself lying on the ground and had no recollections whatsoever how he fell down. He shock his head and stood up again, ready to play some more with the little ones. (He passed his regeneration roll.)
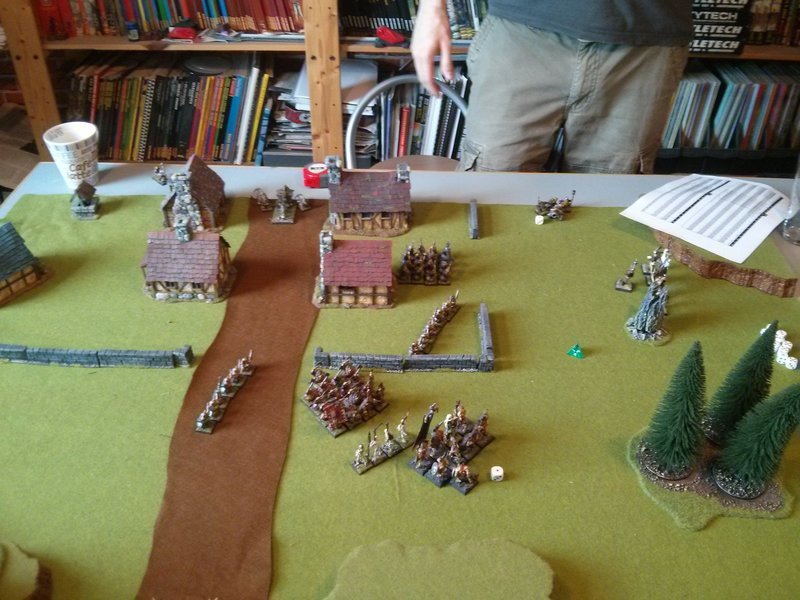
Dwarves
The Turquoise Thunderer Company moved towards the center melee, the Green Thunderer Company turned towards the left flank.
The cannon crew did not shoot, instead they cooled down their barrel.
In the center melee Kevron Three Oaks hit the Beastmen crew three times, caused two wounds and thus killed one of the chaotic creatures. The current Army Standard Bearer, Morgannwg Shaleworker, killed 2 Skeletons. The Beastmen and the Dwarves did not manage to penetrate their opponents defences; the Dwarves killed one Skeleton but suffered no casualty in return. The Dwarves were not able to wound Toadwringa, which in return did not attack as he was still suffering from stupidity.
The Dwarves again won the close combat; the Beastman passed his Rout test, four of the Skeletons crumbled to dust.

Turn 5
Beastmen
Toadwringa finally came to his senses and was able to think clearly again.
Putridmugger rested while Deepmagog with his Three Skulls company advanced further towards the Dwarves.
In the big center melee, Kevron killed the last of the Beastman chariot crew members. In the struggle of the Dwarves versus the troll, the Dwarves missed completely, Toadwringa hit twice but failed to wound. The Skeletons lost another of their ranks, but again did not manage to retaliate.
The resulting instability test came up with a 1, making the Skeletons useless for the rest of the game as they were not allowed to attack any more.
Dwarves
The Green Thunderer Company targeted the Tri Star Beastmen company and caused three wounds, which were all saved by the rusty armour the Beastmen wore!
The cannon shot again at Deepmagog's unit, causing 8 hits and 5 kills. The unit passed its Panic test.
Kevron Blackforge killed Toadwringa a second time, the Dwarves hacked down two more Skeletons, the rest crumbled to dust due to instability.
Toadwringa this time did not regenerate and remained dead on the ground.

Turn 6
Beastmen
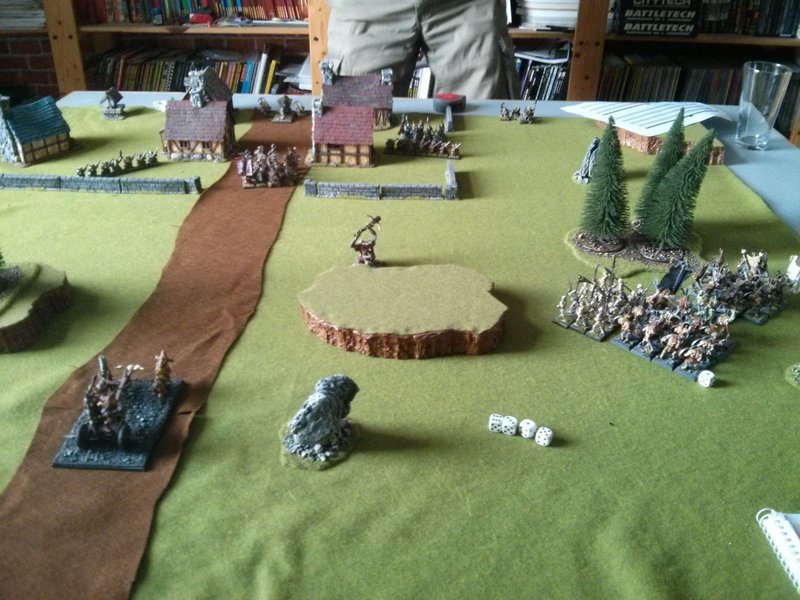
Deepmagog continued his advance with Three Skulls, seeing the Dwarves nearly in charge range. The Shaman rejoined Three Stars and summoned 5 more Skeletons in support.
Dwarves
The Red Company turned 180° and moved back towards the village, trying to buy some more time for decimating the advancing Beastmen with missile fire before they could engage in close combat. The Blue Company did the same maneuver on the other flank for the same reasons.
The Turquoise Thunderers shot at the newly summoned Skeletons, the one lead ball that hit exploded a skull into dust.
In the reserve phase, the Red Company retreated even farther then passed a LD test to turn 180° to face the advancing foes again. Again, the Blue Company mirrored this move.
Turn 7
Beastmen
All three companies moved and reserve moved forwards.
Attack on Three Oaks
Dwarves
The Red Company went into a shield wall formation, again the Blue Company mirrored this maneuver.
The Green Thunderers targeted the Tri Star Beastmen, but only four Dwarves had them in their firing arc; three of them hit, one hit wounded and the wound was not saved.
The cannon targeted the Three Skulls in front of them and also hit the Tri Stars. Deepmagog's unit received eight hits, five wounds and four dead; while Putridmugger's unit received four hits, two wounds and two dead.
Deepmagog's unit had to take a rout test and rolled a 12! With this the attack on that flank also faltered…
Turn 8
Beastmen
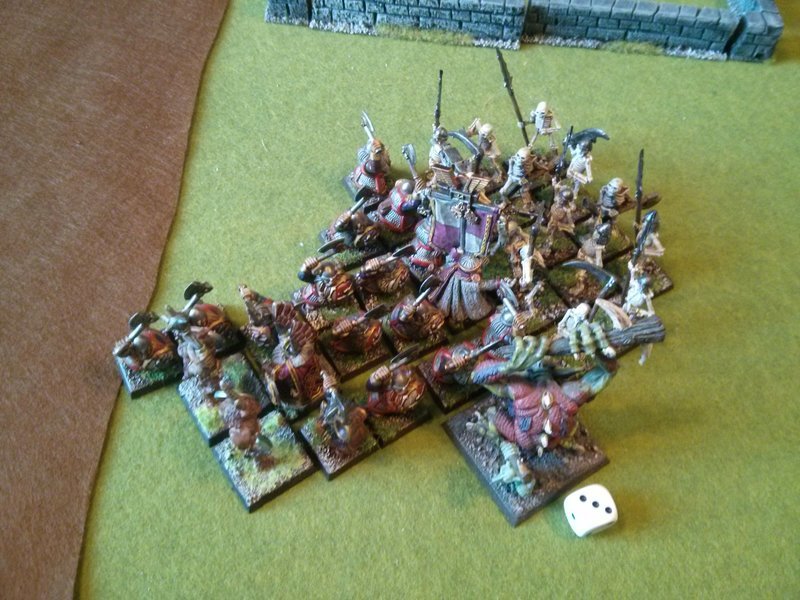
The Skeletons successfully charged the Red Dwarven Company. Putridmugger's Beastmen als charged the Red Company, but due to the Skeletons being in the way the unit became unformed.
The routing Three Skulls nearly left the field, moving to within 1" of the table edge.
In the renewed center melee, the Beastman Shaman issued a challenge which was accepted by Kevron himself. Putridmugger hit Kevron first and caused a wound, which was not saved. In return, Kevron Blackforge hit thrice and caused two wounds.
The Beastman then hit his Dwarf opponent and wounds, but the dwarven armour absorbed the force of the blow. The Foe Smiter smote a Skeleton. The Skeletons caused one hit which failed to wound, and finally the Dwarves missed the Skeletons and caused a non-wounding hit on the Beastman.
The Skeletons and Beastmen were pushed back, the instability test raised one Skeleton again. As the Beastmen were unformed and pushed back, they automatically routed for the second time this battle and streamed back towards their table edge.
Deepmagog on the other flank rallied his few remaining Beastmen.


Dwarves
The Blue Company moved towards the newly rallied Beastmen of Three Skulls.
The Green Thunderers advanced, the Turquoise Thunders turned 90° and then snaked behind Red Company along the village wall.
Then cannon did not fire but cooled down its barrel. It would habe at least one more chance to fire at the Beastmen before they would be back in close combat range.
In the center melee Kevron and the Foe Smiter both killed one Skeleton.
Turn 9
Beastmen
Deepmagog decided to call it a day and retreated with his few surviving chaotic minions.
Debriefing
Three Oaks was saved! The foul chaos creatures never managed to penetrate the village perimeter, and only on dwarf, Rhychdir Calcitebasher, fell casualty.
After the battle everyone was happy to find Rychdir badly wounded and burned by the acid puke of the troll, but still alive. He would not be able to take part in the rescue of the Dwarven mine Kevron's expedition was heading for, but he would survive.
The greatful inhabitants of Three Oaks were more than willing to care for Rhychdir and nurse him until the return of Kevron's force, and they would still owe them for saving their lives and property.
-
Dwarves (Bernd)
As the thunder of the last cannon shot rumbled through the valley, the forces of Beastmen began to retreat. "What a great victory!", Kevron thought as his Clansmen began to cheer. He had to admit to himself that the battle had not turned out as he expected. First of all the Beastmen forces did not try a frontal assault through the main gate, but tried to make a move towards the entrance at his left flank. Also, the chariot did not move at all, which puzzeled him. Well, what can you expect from that goat scum... no leadership and no discipline...
As the enemy forces seemed indecicive on how to approach his fortified position, his ranged forces had more time to shoot at the goats than expected. Especially his cannon proved to be a real boon as the enemy forces chose to move through its firing arch several times.
In the midst of the fight, when Kevron saw that the Beastman would not come through the front gate, he decided that he might actually try to outflank his enemy as the chariot did not seem to move at all and only a single troll would not be real threat. As it turned out, that ugly thing was tough as gromril and got unexpected help from a unit of skeletons as well, and thus his unit was bogged down.
If his cannon would not have caused the Beastman to rout several times the battle might have turned out in a different way...
-
Beastmen (Matthias)
Great... my first game with the third edition rules and I failed miserably...
Had I known how bad the cannon would turn out to be, I would have sent nothing to that flank. Had I known how easily the Thunderers would be able to destroy the chariot, I would not have let it sit unmoving for so long.
I need more trolls... Toadwringa was definitely the best model of my army.
We did several things wrong as it turned out later, but still we very much enjoyed the battle. Compared to later editions, this version offers much more choice and flexibility especially when manoeuvering. It is more time consuming, but in my book this is worth the trouble.
see all
After Action Report
Stargrunt II
Fri, 25 Nov 2016
After Action Report
Song of Blades and Heroes
Fri, 25 Nov 2016
After Action Report
Song of Blades and Heroes
Fri, 25 Nov 2016
After Action Report
Starwars: Imperial Assault
Sun, 15 Nov 2015
After Action Report
Warhammer Fantasy Battles - Warhammer for Adults
Tue, 28 Jul 2015
New Miniature(s) Painted
Steel Forest Stadium
Sat, 06 Jun 2015
New Miniature(s) Painted
Referee and Balls
Sat, 06 Jun 2015
New Miniature(s) Painted
Francworle Galaxy
Sat, 06 Jun 2015
New Miniature(s) Painted
Tooth Crushers
Sat, 06 Jun 2015
New Miniature(s) Painted
Steam Rollers
Sat, 06 Jun 2015


